
Installing baseboard to your house wall using a nail gun will be easy as plenty of dedicated baseboard nail guns are available.
Baseboards are mainly made of solid wood or wooden material. It protects the wall, enhances the beauty of the house, and gives a regal look. We also see plastic-made baseboards for finishing outlook.
If you use both hammer and trim nailer to install baseboards, you know how effective a nail gun is for trim nails. It makes the whole process very relaxed. If you already own a good brad nailer, follow the steps we describe below to nail baseboard with it.
Best Way to Nail Baseboard with Nail Gun
Although installing or replacing baseboards is easy, you still need some knowledge and tools to effectively complete the task. No worry, we have described the process in six steps to easily understand how to do that.
Let’s see:
1. First, Select the Suitable Nail Gun
You will find many nail guns in the market as a brad nailer, finish nailer, framing nailer, pin nailer, etc. Different kinds of nail guns are used for different purposes.
For example, a cordless framing nailer gun is ideal for framing nails in framing assemblies. In contrast, pin nailers are special guns to pin headless nails. For your work, you should use a finish nail gun as it is fit for finishing materials such as baseboard trim, crown molding, etc.
Choosing the proper finishing nail gun will make your work a lot easier. For baseboards, you can also use brad nailers between 15 gauge to 18 gauge.
Important: Usually, baseboards are thin and flat wooden surfaces. If your baseboard is on the thicker side, you should go for a 15 gauge or 16-gauge finish nailer. If it is thin, then you can work with an 18-gauge brad nailer. To know what will be the ideal size of brad nail for baseboard, read the article.

2. Preparing Nail Gun
Once you have picked your finish nailer, you need to prepare it for the work. If you have a cordless nailer, then you must charge its battery beforehand.
On the other hand, if you have an air-powered or pneumatic nailer, you will need an air compressor to run a nail gun. Before starting work, check the air compressor to see if the equipment needs to be oiled.
After all, you need to understand how a nail gun works and prepare yours accordingly.
| # | Preview | Product | Rating | Price | |
|---|---|---|---|---|---|
| 1 |  | NEU MASTER Pneumatic Brad Nailer, 2 in 1 Nail Gun... | $39.99 | Buy on Amazon | |
| 2 | 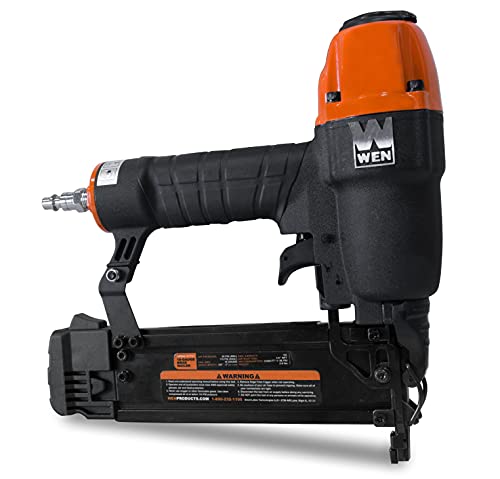 | WEN 61721 18-Gauge 3/8-Inch to 2-Inch Pneumatic... | $27.99 | Buy on Amazon | |
| 3 |  | RYOBI 18-G Cordless Brad Nailer (Tool Only),Model:... | 311 Reviews | $137.97 | Buy on Amazon |
Last update on 2024-04-25 / Affiliate links / Images from Amazon Product Advertising API
3. Preparing Baseboard
Now you need to prepare the baseboard. To do that, you need to measure the length of the wall where you want to install it. After taking the measurements, you need to cut the baseboard to the correct size.
If you plan on putting baseboards on multiple walls, you need to measure each wall and cut baseboards accordingly. For the corners, you have to cut the baseboards at a 45-degree angle. Once you are done cutting, you can move into the next step.
However, if you have multiple baseboards, you can mark them on the back or place them on the floor where they should be installed. So that you do not make any mistakes while nailing.
4. Place the Baseboard Adequately
Take a piece of baseboard and place it against the wall, slightly touching the floor. You can use wood hole filler or wood glue to keep it in place, though it is optional.
For smaller pieces, it is not that necessary.
The primary intention is to be sure that the inner corner meets the wall adequately. Leaving any gaps will result in a sloppy outcome, and you might need to redo it. If you are not interested to use glue, try hammer down two nails on the baseboard. Place the inner corner properly and insert a nail. Then put a pin on the other end of the baseboard so that the entire piece stays in place.
5. Fasten Nails on Baseboard
In the steps, you need to put nails into the baseboard. You can start from one side and finish on the other. Otherwise, you can first ensure placement by setting two pins on both ends, as we told you previously. Afterward, put nails in between the gaps.
Now the question is how many nails you need to insert in between. It is better to insert a pin every 12 inches/ 1-foot distance.
You can put nails, leaving approximately a 10 to 12 inches gap in between two pins. The longer your baseboard is, the more nails you need to fasten and vice versa.
6. Finalize with Additional Nailing
As you are done putting the baseboard in place using a brad nail gun, all you need to do is ensure that you did a clean job. Therefore, you need to check if there are any mistakes or any more nail sets are required. If you feel like someplace might need more support, go ahead and put more nail holes. It is better to put extra nails on both sides of the baseboards for good support.
Moreover, check whether there is any gap between the wall and the baseboard. If available, then shoot some nails there to close the gap. You can also use some wood putty to fill up any gaps or dents. And your task is complete!
Safety Measures
Although following the steps will make it extremely easy to nail baseboard with a pneumatic brad nailer, you still need to be careful while working.
1. You need to be extra careful if you are using the nailer for the first time. That’s why you should practice shooting nails a few times before you start putting nails on the baseboard. You can use some spare wood or baseboard to practice. Once you get a grip on shooting nails with a nail gun, then you can start nailing your baseboard.
2. You will see some cables hang around while using a pneumatic nailer or electric brad nailer. You should be careful about these. If somehow the wires get into the way of nailing, it can hamper the entire process.
3. Once you are done nailing your baseboard, disconnect the device or switch it off. You must do so to avoid any accident.
Read: 6 Best Nail Gun for Plywood Sheathing in 2022
Last update on 2024-04-25 / Affiliate links / Images from Amazon Product Advertising API
Final Words
Installing baseboards using a nail gun can be the first step to the journey of your house renovation. Installing the baseboard is the easiest, especially now, after knowing the process of nailing the baseboard with a nailer.
Once you have successfully completed installing baseboards, you can move on to other projects like installing crown molding, making cabinets, and so on. Moreover, you can do these using the same nailer that you used for putting baseboard.
Leave a Reply